Plain Limit Gauges
BS 969 : 2008
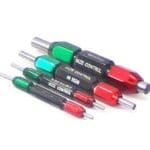
This standard specifies the tolerances and limits for simple forms of limit gauges, such as:
Cylindrical plain plug,
Plain ring gauge
Gap gauge
Pin gauges
It is intended for reference by component producers and gauge makers when gauge limits have not been stipulated. It specifies gauge tolerances for work piece tolerances in ranges between 0.009mm and 3.200mm and how gauge limits are related to the work piece limits. It also specifies types of gauge according to size and minimum work piece tolerance, dimensions are expressed in millimetres but appropriate values in imperial units are given in appendix C.
Care and use
1. Always select the plain limit gauge that best fits the application.
2. Care should be taken while using plain limit gauges. Should you drop a plain limit gauge, it should be re-calibrated/repaired before reusing it.
3. Always clean gauges after use with a lint free paper or cloth and store in its box.
4. Do not use excessive force when applying the gauge to the component.
5. Where gauges are showing wear on the front surface, the gauge can be reversed in the handle (applies to double ended reversible pin gauges).
6. Never use a plain limit gauge that has not been calibrated, if in doubt consult an appropriate authority.
It is highly recommended that an appropriate authority such as a UKAS approved laboratory carries out a full calibration on plain limit gauges at least once a year. In between UKAS calibrations at a frequency based on usage, plain limit gauges should be calibrated in-house. A typical in-house calibration would include a written procedure and an associated calibration record sheet, which would contain as a minimum, the following listed information:
Plain limit gap gauges
(a) Serial number
(b) Location
(c) Procedure number
(d) Workpiece tolerance
(e) Gauge tolerance
(f) Results
(g) Measurement uncertainty
(h) Sentence if appropriate
(i) Date and calibrators signature
(j) Traceability to National Standards
It is necessary that any person carrying out such calibration work should have received appropriate training and have shown the ability to be confident via a suitable training authority. Training records should be held and maintained.
Following are layouts for typical in-house calibrations for plain limit gauges:
Calibration to be carried out in accordance with in-house procedure number .......................
Serial Number: Make:
Calibration Date: Sizes:
FEATURE EXAMINED SPEC. MEASURED RESULTS
GO:
NOT GO:
The plain limit gap gauges were visually inspected for damage and the following faults were noted:
MEASUREMENT UNCERTAINTY +/- 0.003mm (0.5-100mm range)
Source: UKAS schedule of accreditation, Calibration and measurement capability (CMC)
Calibrators Signature: ........................................
A traceability statement in this section would be required for all items and their relevant certification utilised for the calibration of plain limit gap gauges.
Plain Plug Gauges
BS 969 : 2008
Calibration to be carried out in accordance with in-house procedure number .......................
Serial Number: Make:
Calibration Date: Sizes:
FEATURE EXAMINED SPEC. MEASURED RESULT
FRONT MIDDLE BACK
GO:
@ 90 degrees:
NOT GO:
@ 90 degrees:
The plain limit plug gauges were visually inspected for damage and the following faults were noted:
MEASUREMENT UNCERTAINTY +/- 0.0005mm (1-25mm range)
Source: UKAS schedule of accreditation, Calibration and measurement capability (CMC)
Calibrators Signature: ........................................
A traceability statement in this section would be required for all items and their relevant certification utilised for the calibration of plain limit plug gauges.
Go/Not-go Plain Ring Gauges
BS 969 : 2008
Calibration to be carried out in accordance with in-house procedure number .......................
Serial Number: Make:
Calibration Date: Sizes:
FEATURE EXAMINED SPEC. MEASURED RESULT
FRONT MIDDLE BACK
GO:
@ 90 degrees:
NOT GO:
@ 90 degrees:
The plain ring plug gauges were visually inspected for damage and the following faults were noted:
MEASUREMENT UNCERTAINTY +/- 0.0008mm (2-25mm range)
Source: UKAS schedule of accreditation, Calibration and measurement capability (CMC)
Calibrators Signature: ........................................
A traceability statement in this section would be required for all items and their relevant certification utilised for the calibration of plain ring gauges.


