Traceability
Reference Standards on UKAS calibration Certificates
The purpose of this section is to assist you with the discussions you may have with assessors from certification bodies about the content of calibration certificates.
Difficulties sometimes occur because assessors wish to see details of the reference standards used for calibration included on UKAS calibration certificates.
Any calibration laboratory that holds UKAS accreditation has to operate in accordance with UKAS requirements at all times. These requirements apply not only to the calibrations for which the laboratory offers a service, but also to all subsidiary measurements (for example, of environmental conditions) whose accuracy may significantly affect the accuracy or validity of such calibrations.
The laboratory has to have procedures for carrying out the calibrations & for the management & calibration of its reference standards of measurement & other measuring equipment. These procedures have to meet the requirements of the the current UKAS accreditation standard.
To satisfy the UKAS requirement, laboratories must hold all of the appropriate reference standards of measurement that they need, and maintain them in an appropriate state of calibration at all times.
UKAS checks that the above requirements are being satisfied. There is therefore no need to provide details of the equipment used on calibration certificates since UKAS accreditation provides all the assurances that the user needs.
This text is based upon a technical policy statement issued by the United Kingdom Accreditation Service.
Metrology - Gauge Blocks
Prior to the introduction of what we now term as Gauge Blocks, the earliest type of length standard was known as the Polhem Stick so named after the Swedish inventor Christopher Polhem. The exact date of his invention is unknown, what is known is that sticks of this type were in use prior to 1700. This in itself is somewhat unusual as at that time there was no requirement for the early locksmiths, clockmakers and the like to make anything other than parts that fitted together on an individual basis as no interchangeability was ever considered.
The mass production armaments factories in the 19th century and the requirements of interchangeability of, in particular the firing mechanism that often failed in the battlefield, lead to the inevitable introduction of gauges for all stages of manufacture. Unfortunately this also resulted in the production of many thousands of gauges and so the problem of interchangeability remained, in that there was no record of which gauge had been used to produce what firing mechanism for what weapon. This was by no means a problem that was limited to England and Europe in the United States of America the problem was highlighted during the Wars of Independence and the Civil Wars between the North and the South.
In 1894 the Swedish State placed a large order for the manufacture of Rifles from the German Mauser Factory. The weapons ordered were to be inspected by a commission set up by the Swedish State and a member of this commission was the armourer inspector Carl Edvard Johansson. When C.E. Johansson saw how things were arranged at the Mauser Factory, he realised that many thousands of gauges would be required to be manufactured before the Rifles could be made in Sweden. So upon completion if his commission in 1896 and during his return journey home he had the opportunity to consider and idea that he had for a relatively small number of gauge blocks that might possibly be made so that in combination with each other they would provide all the measurement figures required in the manufacturer of rifles. Thus the revolutionary idea of - The Combination Gauge Block Set - was conceived.
Standard: BS EN ISO 3650: 1999, Length standards / gauge blocks (metric) up to 1000mm
Standard: BS 4311-1: 2007, Length standards / gauge blocks (imperial) up to 4 inches
The above standards reference 4 different grades:
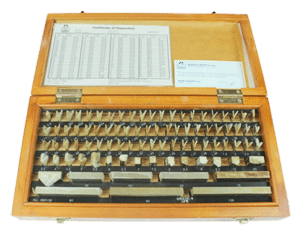
- Grade K - This is a calibration grade gauge block which all other grades of gauge blocks are calibrated against. This is a master grade gauge block calibrated by interferometry
- Grade 0 - Highest grade accuracy working gauge block
- Grade 1 - Medium grade accuracy working gauge block
- Grade 2 - Lowest grade accuracy working gauge block
Grades 0-2 are calibrated by comparison against a Grade K gauge block.
View more information on our gauge block calibration services
It should be noted that even the lowest grade accuracy gauge block is adequate for usage in many general purpose engineering applications
The most common range of gauge blocks is 0.5mm to 100mm
Gauge blocks (slip gauges) are available in a variety of materials such as steel, tungsten carbide, and ceramic. Steel is the most commonly used material. Tungsten carbide and ceramic are used for applications where the gauge block needs to be more resistant to wear.
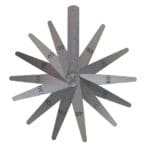
In applications where the accuracy of gauge blocks is not required or if a range of less than 0.5mm is needed, feeler gauges can be used in these applications:
BS 957: 2008
Range covered: 0.03mm to 1.00mm and 0.0015" to 0.025"
There are no accuracy grades for feeler gauges. The most common material is hardened steel.
International standards reference deviation from the nominal thickness and local thickness variation.
An example tolerance would be:
Nominal: 0.03mm (+ 0.004mm) and a local thickness variation (0.004 mm).
Feeler gauges are normally used in engineering applications where a small gap needs to be measured or set.
More about Rhopoint Metrology feeler gauge calibration services


