BS 4311, BS EN ISO 3650
Calibration ensures that your gauge blocks maintain their precision, providing reliable reference standards for other measurements. Rhopoint Metrology offers ISO 17025 certified calibration to single point or 5 point.
Angle Slip GaugesTo Top | ||||
| Traceable Calibration for Angle Slip Gauge – Per Block | Traceable | Add to Quote | ||
2 Block SetTo Top | ||||
| UKAS Calibration for Slip Gauge Blocks – 1-Point: 2 block set | UKAS | Add to Quote | ||
| UKAS Calibration for Slip Gauge Blocks – 5-Point: 2 block set | UKAS | Add to Quote | ||
3 Block SetTo Top | ||||
| UKAS Calibration for Slip Gauge Blocks – 1-Point: 3 block set | UKAS | Add to Quote | ||
| UKAS Calibration for Slip Gauge Blocks – 5-Point: 3 block set | UKAS | Add to Quote | ||
4 Block SetTo Top | ||||
| UKAS Calibration for Slip Gauge Blocks – 1-Point: 4 block set | UKAS | Add to Quote | ||
| UKAS Calibration for Slip Gauge Blocks – 5-Point: 4 block set | UKAS | Add to Quote | ||
4 to 47 blocksTo Top | ||||
| UKAS Calibration for Slip Gauges (Gauge Blocks) – 1-point: > 4 Upto 47 blocks – M5,M8,M41,M47 (E8,E28,E41) | UKAS | Add to Quote | ||
| UKAS Calibration for Slip Gauges (Gauge Blocks) – 5-point: > 4 Upto 47 blocks – M5,M8,M41,M47 (E8,E28,E41) | UKAS | Add to Quote | ||
47 to 122 blocksTo Top | ||||
| UKAS Calibration for Slip Gauges (Gauge Blocks) – 1-point: > 47 Upto 122 blocks – M88,M112,M122 (E81,E90) | UKAS | Add to Quote | ||
| UKAS Calibration for Slip Gauges (Gauge Blocks) – 5-point: > 47 Upto 122 blocks – M88,M112,M122 (E81,E90) | UKAS | Add to Quote | ||
Slip Gauge Accessory SetTo Top | ||||
| Traceable Calibration for Slip Gauge Accessory Sets | Traceable | Add to Quote | ||
Precise Slip GaugesTo Top | ||||
| Traceable Calibration for Precise Slip Gauges | Traceable | Add to Quote | ||
If you haven’t found the calibration you require or need some further assistance with your requirement, contact us using this form and we can find the solution you are looking for.
To ensure we can promptly address your calibration enquiry, please complete the form with all the necessary details. This will help us to provide you with accurate and timely assistance.
For urgent enquiries, please contact us directly via phone at:
The above standards reference 4 different grades:
Grades 0-2 are calibrated by comparison against a Grade K gauge block.
It should be noted that even the lowest grade accuracy gauge block is adequate for usage in many general purpose engineering applications. The most common range of gauge blocks is 0.5mm to 100mm
Gauge blocks (slip gauges) are available in a variety of materials such as steel, tungsten carbide, and ceramic. Steel is the most commonly used material. Tungsten carbide and ceramic are used for applications where the gauge block needs to be more resistant to wear.
In applications where the accuracy of gauge blocks is not required or if a range of less than 0.5mm is needed, feeler gauges can be used in these applications.
Prior to the introduction of what we now term as Gauge Blocks, the earliest type of length standard was known as the Polhem Stick so named after the Swedish inventor Christopher Polhem. The exact date of his invention is unknown, what is known is that sticks of this type were in use prior to 1700. This in itself is somewhat unusual as at that time there was no requirement for the early locksmiths, clockmakers and the like to make anything other than parts that fitted together on an individual basis as no interchangeability was ever considered.
The mass production armaments factories in the 19th century and the requirements of interchangeability of, in particular the firing mechanism that often failed in the battlefield, lead to the inevitable introduction of gauges for all stages of manufacture. Unfortunately this also resulted in the production of many thousands of gauges and so the problem of interchangeability remained, in that there was no record of which gauge had been used to produce what firing mechanism for what weapon. This was by no means a problem that was limited to England and Europe in the United States of America the problem was highlighted during the Wars of Independence and the Civil Wars between the North and the South.
In 1894 the Swedish State placed a large order for the manufacture of Rifles from the German Mauser Factory. The weapons ordered were to be inspected by a commission set up by the Swedish State and a member of this commission was the armourer inspector Carl Edvard Johansson. When C.E. Johansson saw how things were arranged at the Mauser Factory, he realised that many thousands of gauges would be required to be manufactured before the Rifles could be made in Sweden. So upon completion if his commission in 1896 and during his return journey home he had the opportunity to consider and idea that he had for a relatively small number of gauge blocks that might possibly be made so that in combination with each other they would provide all the measurement figures required in the manufacturer of rifles. Thus the revolutionary idea of – The Combination Gauge Block Set – was conceived.
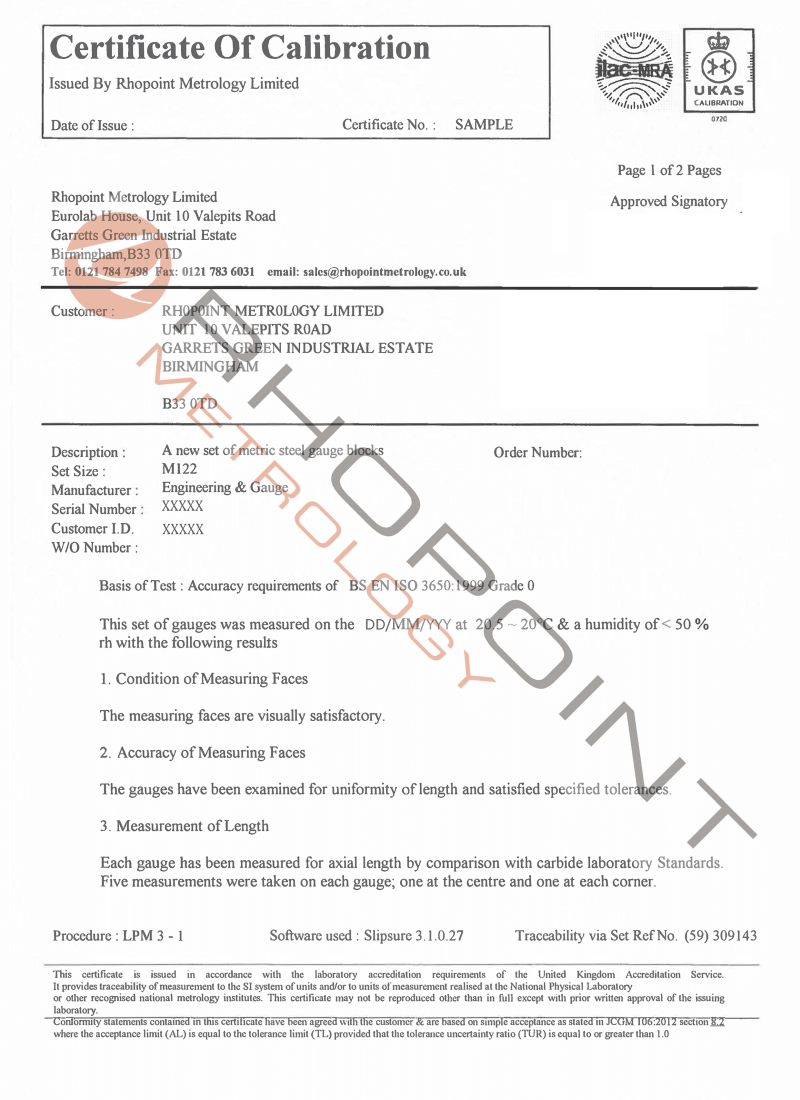
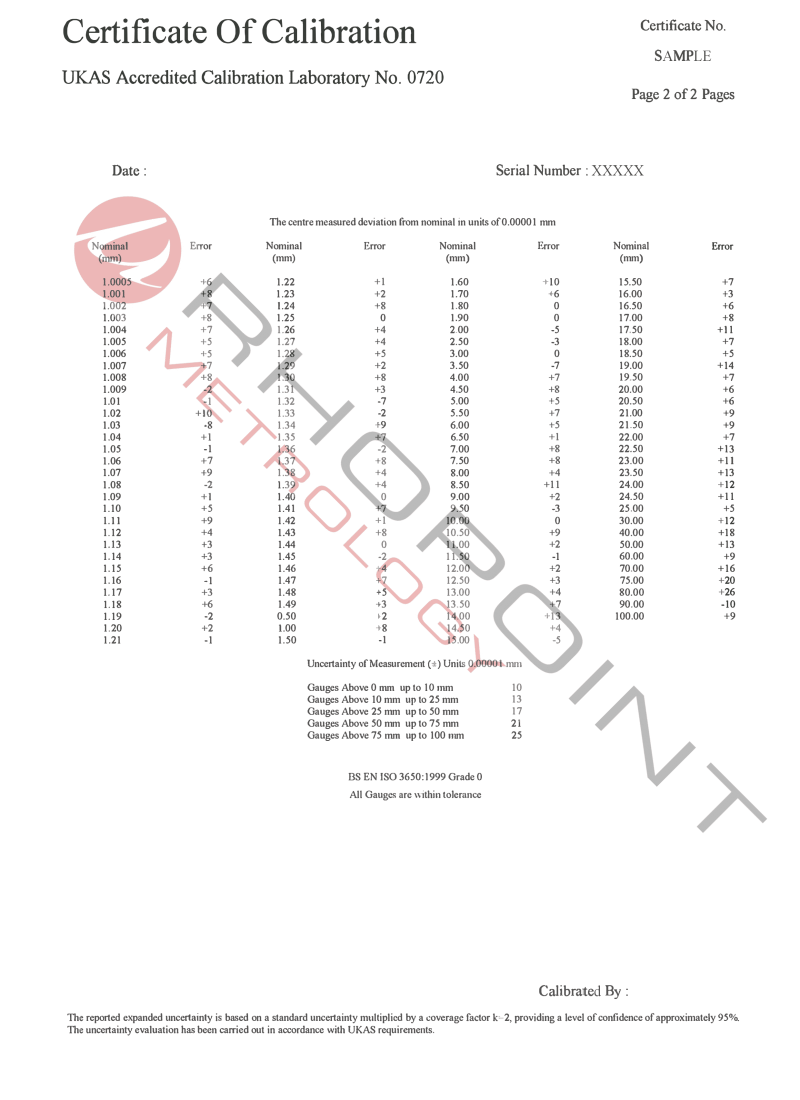
Below is a layout for a typical in-house calibration for a metric gauge block set.


All of our Laboratories are accredited to provide UKAS & Traceable calibrations to all the relevant standards giving you peace of mind.
Make consistent, accurate and reliable measurements
Ensure longevity of the measuring instruments
Ensure safety in critical applications such as medical and aerospace
|
Uploaded
Failed
|
 |